Documentation Index
Fetch the complete documentation index at: https://developers.hubspot.com/docs/llms.txt
Use this file to discover all available pages before exploring further.
Supported products
Supported products
Prerequisites
Review the following prerequisites before proceeding with the steps below:- Confirm that you’re on the latest version of the HubSpot CLI. Version
8.4.0or above is recommended. - An Enterprise subscription is required to install an app with serverless functions. While developing your app, you can use a developer test account to test your app’s functionality without the need for an Enterprise subscription.
Create a new app with a serverless function
To get started, run the command below to create a new project with scaffolding for an app card and support for serverless functions.Wire up your app card and serverless function
Next, edit the following files to include the contents of the respective code blocks below:- MyCard.jsx
- NewFunction.js
- private-function-hsmeta.json
NewFunction.js uses the third-party axios dependency, you’ll also need to install the package locally by navigating to the functions/ directory, then running npm install axios. For example, in the terminal, if you’re already in the root directory of your project, you’d run the following two commands:
axios is installed, run the following command to upload your project to your HubSpot account:
Install your app and locate your access token
With your project uploaded, you can install your app in either your standard HubSpot account, or a developer test account:- Install in a standard account
- Install in a developer test account
If you have the required user permissions, you can install your app directly in your standard account: After initiating the install, you’ll be prompted to review the app permissions.
- In your HubSpot account, navigate to Development.
- In the left sidebar menu, navigate to Projects, click the name of your new project, then click the UID of your app in the component list.
- On the Distribution tab, under Standard install, click Install now.
- Select the checkbox to authorize installing an unverified app, then click Connect app.
- Once successful, click View installed app details to navigate to the Connected Apps page of the account where you installed your app.
- Navigate back to Development.
- In the left sidebar menu, navigate to Projects, click the name of your new project, then click the UID of your app in the component list.
- If you need to use your app’s access token, you can click the Distribution tab, then click Show under Standard install to reveal your static auth access token. Note that your serverless function will already be able to access a built-in secret called
PRIVATE_APP_ACCESS_TOKENby default, and you don’t need to add it manually as a secret.

Test out your app card
You can now test out the serverless function on a contact record. First, you’ll need to add the app card to the default contact record view:- In your HubSpot account, navigate to CRM > Contacts.
- Click the name of an existing contact.
- In the middle column of the record, to the right of the existing tabs, click Customize.

- On the Record Customization tab, in the view table, click Default view.
- In the middle column, under the default tabs, hover over where you want your app card to appear, then click Add card.

- In the right panel, click the Card library tab.
- Search for the name of your app card by the
uidspecified in your project’s/src/app/cards/card-hsmeta.jsonfile. You can also click the All card types dropdown menu and select Apps to filter by app cards. - Locate your app card then click Add card.

- Click the X in the top right to close the right panel.
- In the top right, click Save and exit.

Local development
As you continue to develop and test your serverless function and app card, you can runhs project dev to help you preview changes and debug errors directly in your terminal. You’ll be prompted to select the account to test on, which you should choose based on where you installed your app in the step above
Once your deployed build and dependencies are validated, a new browser tab or window will open to a Local dev panel where you can review the status of each of your app’s components.
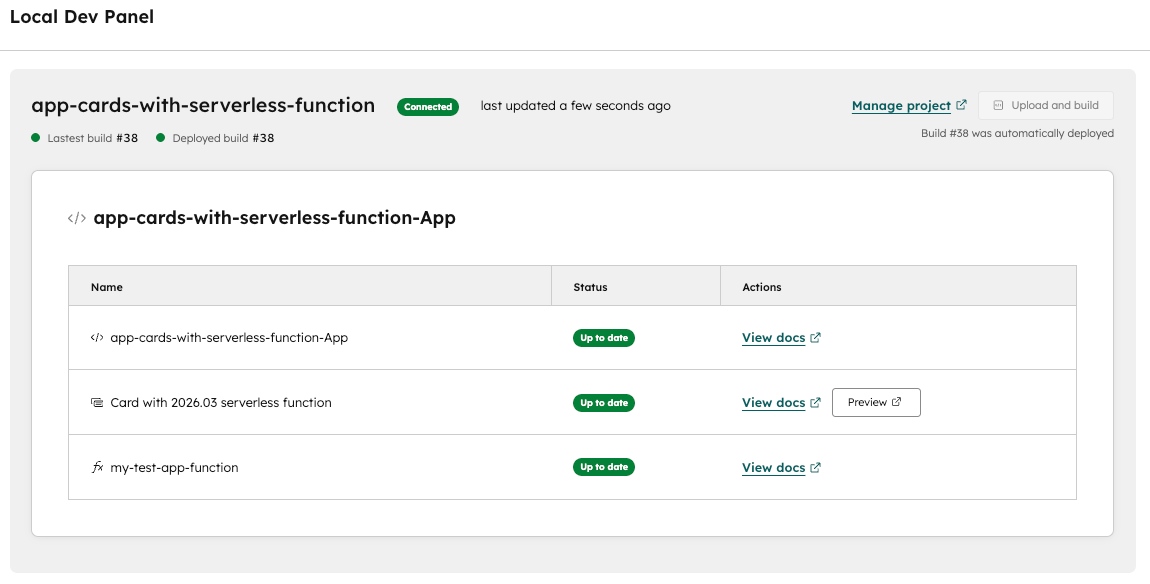
- In the Actions column, you can click Preview next to your app card component to navigate to the contacts index page.
- You can then navigate to a specific contact and test out your app card, and any
consolelogging statements (e.g.,console.log()orconsole.error()) will be logged to your terminal to help you debug.
/src/app/cards/MyCard.tsx) while running hs project dev, the changes should automatically be detected and reflected when previewing the changes.
Note that changes to your serverless functions in
/src/app/functions will not automatically update your app and you’ll need to run hs project upload to ensure your changes are deployed to the account where you installed your app.